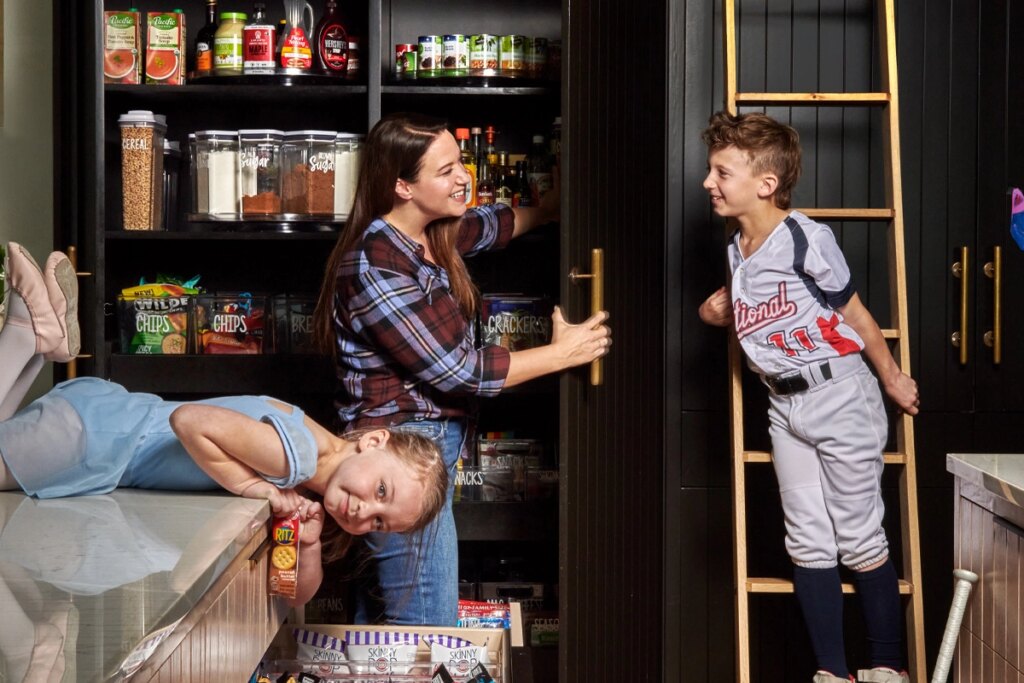
Interior designer Angeline Guido Hall designed the side-by-side pantry cabinets in her Heath home to make a stylish statement. Behind the black paneled doors, though, things were decidedly less beautiful. “It was unhinged,” Hall laughs of the disorganized space. So she enlisted Kim Longoria-Bruce, owner and lead organizer at Organizing Spaces by Kim, to clean up her family’s act.
One of the key decisions Longoria-Bruce made was to move snacks enjoyed by Hall’s two children, Smith (8) and Afton (5), out of the pantry and into a nearby drawer. Having a designated snack station has made a world of difference for the Hall family. Here’s why you should consider one—and how to create your own.
How to Create Your Own
1. Consider the location.
If you have a large pantry, designate a low shelf or cabinet as a zone for kids. But if you’re short on space, or you’d rather not have your kids (and their friends) rummaging around in your pantry, reclaim a nearby cabinet or drawer. “Find an area in the kitchen that’s easy for them to access but at the same time isn’t high-traffic,” Longoria-Bruce suggests. Another pro of having your snack station outside the pantry? Visibility. “They can’t go hide in the pantry [to snack],” Hall says.
2. Choose your containers.
Containers are necessary to create parameters for categories and maximize space. “A lot of those cardboard boxes come with, like, four bags of Cheez-Its in them,” Longoria-Bruce says. “When you decant, you’re able to fit more.” But which containers you use depends on what and where you’re storing.
Style: Open bins are best for individually sealed items (like bags of chips or fruit cups). If they’re kept on a shelf, use ones with a lower front so kids can reach in. “Another great option is a divided lazy Susan,” says Longoria-Bruce, who uses these to corral slender snacks, like granola bars and meat sticks, on deep shelves. Canisters with spouts are great for decanted goods, like cereal.
Material: In the kitchen, Longoria-Bruce prefers hard-sided containers to cloth or woven alternatives for ease of cleaning.
Transparency: Longoria-Bruce says most clients are of the “If I can’t see it, I won’t eat it” mindset, so clear bins are best. “If being able to see everything is going to be too much visual clutter for you, we do an opaque bin,” she says.
3. Label your “zones.”
Clearly identifying what goes where makes it easy for everyone—family, guests, and in-house help, like housekeepers and nannies—to understand your system. Longoria-Bruce advises keeping labels general so you’re not locked in as preferences change. If your kids are too young to read? “Do picture labels,” she says.
4. Maintain.
Weekly: “Typically after we do grocery runs, we do a small refresh,” Longoria-Bruce says. Assess, restock, and tidy up as needed.
Quarterly: “Quarterly to every six months, check for expired products,” says Longoria-Bruce, who notes expiration dates on the bottom of decanting canisters.
FIND IT! Shop Longoria-Bruce’s favorite organizational products at her Amazon storefront, accessible via Instagram: @organizingspacesbykim
Author